Key takeaways:
- A troubleshooting guide helps anyone find and fix known issues using a common, tested process.
- Good troubleshooting guides cut resolution time for support teams and let people fix issues without a ticket.
- Avoid testing troubleshooting guides yourself; instead, run practice incidents with people who might use them in real scenarios.
A troubleshooting guide helps someone solve problems without outside support. A well-crafted troubleshooting guide gives clear steps to diagnose the issue and apply a fix in a logical order.
It's much easier to create these guides once you know what they must include, the troubleshooting methods to build around, and an example to follow.
What is a troubleshooting guide?
A troubleshooting guide is a document users can turn to while something is broken. An effective troubleshooting guide is built for the moment someone is mid-problem and guides them to a solution from any point.
Common troubleshooting situations include a customer whose cart won't check out, a laptop with no internet, or a web page that cannot load properly. In all of them, the user should be able to find matching symptoms and follow a fix.
That differs from a troubleshooting report, which is written after the fact. It documents what went wrong, why it happened, and what was fixed for the record. A troubleshooting guide is meant to be used while the problem is happening.
It also differs from user manuals and instructions. Manuals explain how the product works from the start, defining features, their setup, and intended use. A troubleshooting guide assumes the reader already knows all of that and jumps straight to solving specific problems.
Why troubleshooting guides matter for support teams
Without a troubleshooting guide, only a couple of team members may know a fix. If they're out sick or have left the company, everyone else gets stuck, or the same issue gets solved in incompatible ways.
A well-crafted troubleshooting guide fixes that by giving customers a way to solve problems on their own without opening a ticket. Support teams benefit just as much, since anyone can follow the same troubleshooting process that's documented once and reused.
New hires don't need to relearn it from scratch, which also speeds up onboarding and keeps everyone on the same page. Perhaps most importantly, teams achieve what managers always push for: process consistency.
Individual knowledge turns into documentation the whole team or even customers can rely on. Resolving small problems quickly can also prevent them from becoming larger issues that affect the customer experience.
5 troubleshooting approaches and when to use them
Different problems call for different troubleshooting methods, each used in fields from engineering to customer support. Some require casting a wide net with careful diagnostic tools, while others go straight to potential problems.
- Top-down. Start at the user-facing symptom, such as the error message or broken screen, and work backwards toward the cause.
- Bottom-up. Start at the hardware infrastructure level (the server or network devices) and work forwards toward the symptoms.
- Divide-and-conquer. Start in the middle of the system and test in each direction to narrow down which half holds the problem.
- Follow-the-path. Trace the exact route the data or the user takes, step by step, until something breaks.
- Move-the-problem. Swap a suspected component, such as a cable, a device, or an account, to see if the issue follows it or stays behind.
Most troubleshooting guides don't rely on just one method, since they all ultimately aim to locate and solve problems. A guide might open top-down to spot the symptom, then switch to divide-and-conquer with diagnostic tools to isolate it.
The troubleshooting process in 7 steps
- Gather information. Pull the error codes, messages, log entries, and details on what the user was doing when it broke. Check whether it's happening to one person or everyone.
- Describe the problem clearly. Be as specific as possible. Instead of "Checkout is broken," write "Checkout returns a 500 error for PayPal payments on mobile Safari, but works fine on desktop and with other payment methods."
- Determine the most probable cause. Use the information you have to narrow down what's likely responsible before changing anything.
- Create a plan and pick a solution to test. Choose one possible solution, but before you change anything, decide exactly how you'll know it worked.
- Implement the solution and test it. Apply the fix, then check whether the original symptom is actually gone.
- Analyze the results. If the symptom's gone, confirm your fix didn't break anything else. If it did, go back to step 3 with that cause ruled out.
- Document the process. Document the confirmed cause, fix, and troubleshooting steps so the process can be reused when the same issue happens again. Automated guide creation tools can save time by turning such a write-up into a shareable guide without manual typing.
The same seven steps apply whether you're troubleshooting a single device or responding to a system-wide outage. The scale changes, but the process stays the same.
What to include in a troubleshooting guide
No matter the issue, every effective troubleshooting guide uses the same core sections and outlines steps to diagnose and solve the problem in numbered order.
- Title and summary: what the guide covers and who it's for in one line.
- What you need before starting: access, permissions, and diagnostic tools the person needs to approach the problem correctly.
- Symptom: the exact error code, messages, or other information described and worded precisely as it appears.
- Affected systems: exactly which product, device, or environment the issue shows up in.
- The steps: the ordered actions that isolate and test the cause.
- Root cause: what's actually confirmed to be responsible.
- Fixes: the specific actions that resolve the issue, listed in the order to try them.
- How to check it worked: what the "fixed" system looks like, so nobody closes the ticket too early.
- Who to escalate to: the person or team to contact if the fix doesn't work.
- How to prevent it: additional steps one could take to prevent the issue from coming back in the future.
How to find common issues and root causes
Most teams don't have to look far to list common problems that need troubleshooting guides. Support tickets, chat logs, monitoring alerts, postmortems, and even your site's search bar can show where employees or customers get stuck.
Error reports are rarely useful without some additional work. Pull out what actually occurred, document what should have happened, and try to recreate the problem yourself. That's your problem statement for building a troubleshooting guide around.
Don't stop at surface triggers. The 5 “Whys” method helps identify the root cause of an issue. Start with the symptoms, ask why they happened, then ask why that happened, and repeat until you land on something you can fix.
How to Create Troubleshooting Guides With Guideless
Written troubleshooting guides can be time-consuming to create and difficult to follow when they rely on long, text-heavy instructions.
The challenge is even greater with software workflows, which can change frequently as products and interfaces are updated. Do the fix once, and Guideless captures each step automatically while AI turns the workflow into written steps and a narrated video guide.

You can also add your branding and generate embed code. You can embed Guideless troubleshooting guides where users are most likely to encounter the issue, making the instructions easier to access when they need them.
The blur function hides account numbers, emails, and other sensitive details, so guides stay safe to share even publicly. If the workflow changes, you can edit the existing steps directly in the video instead of recording again.
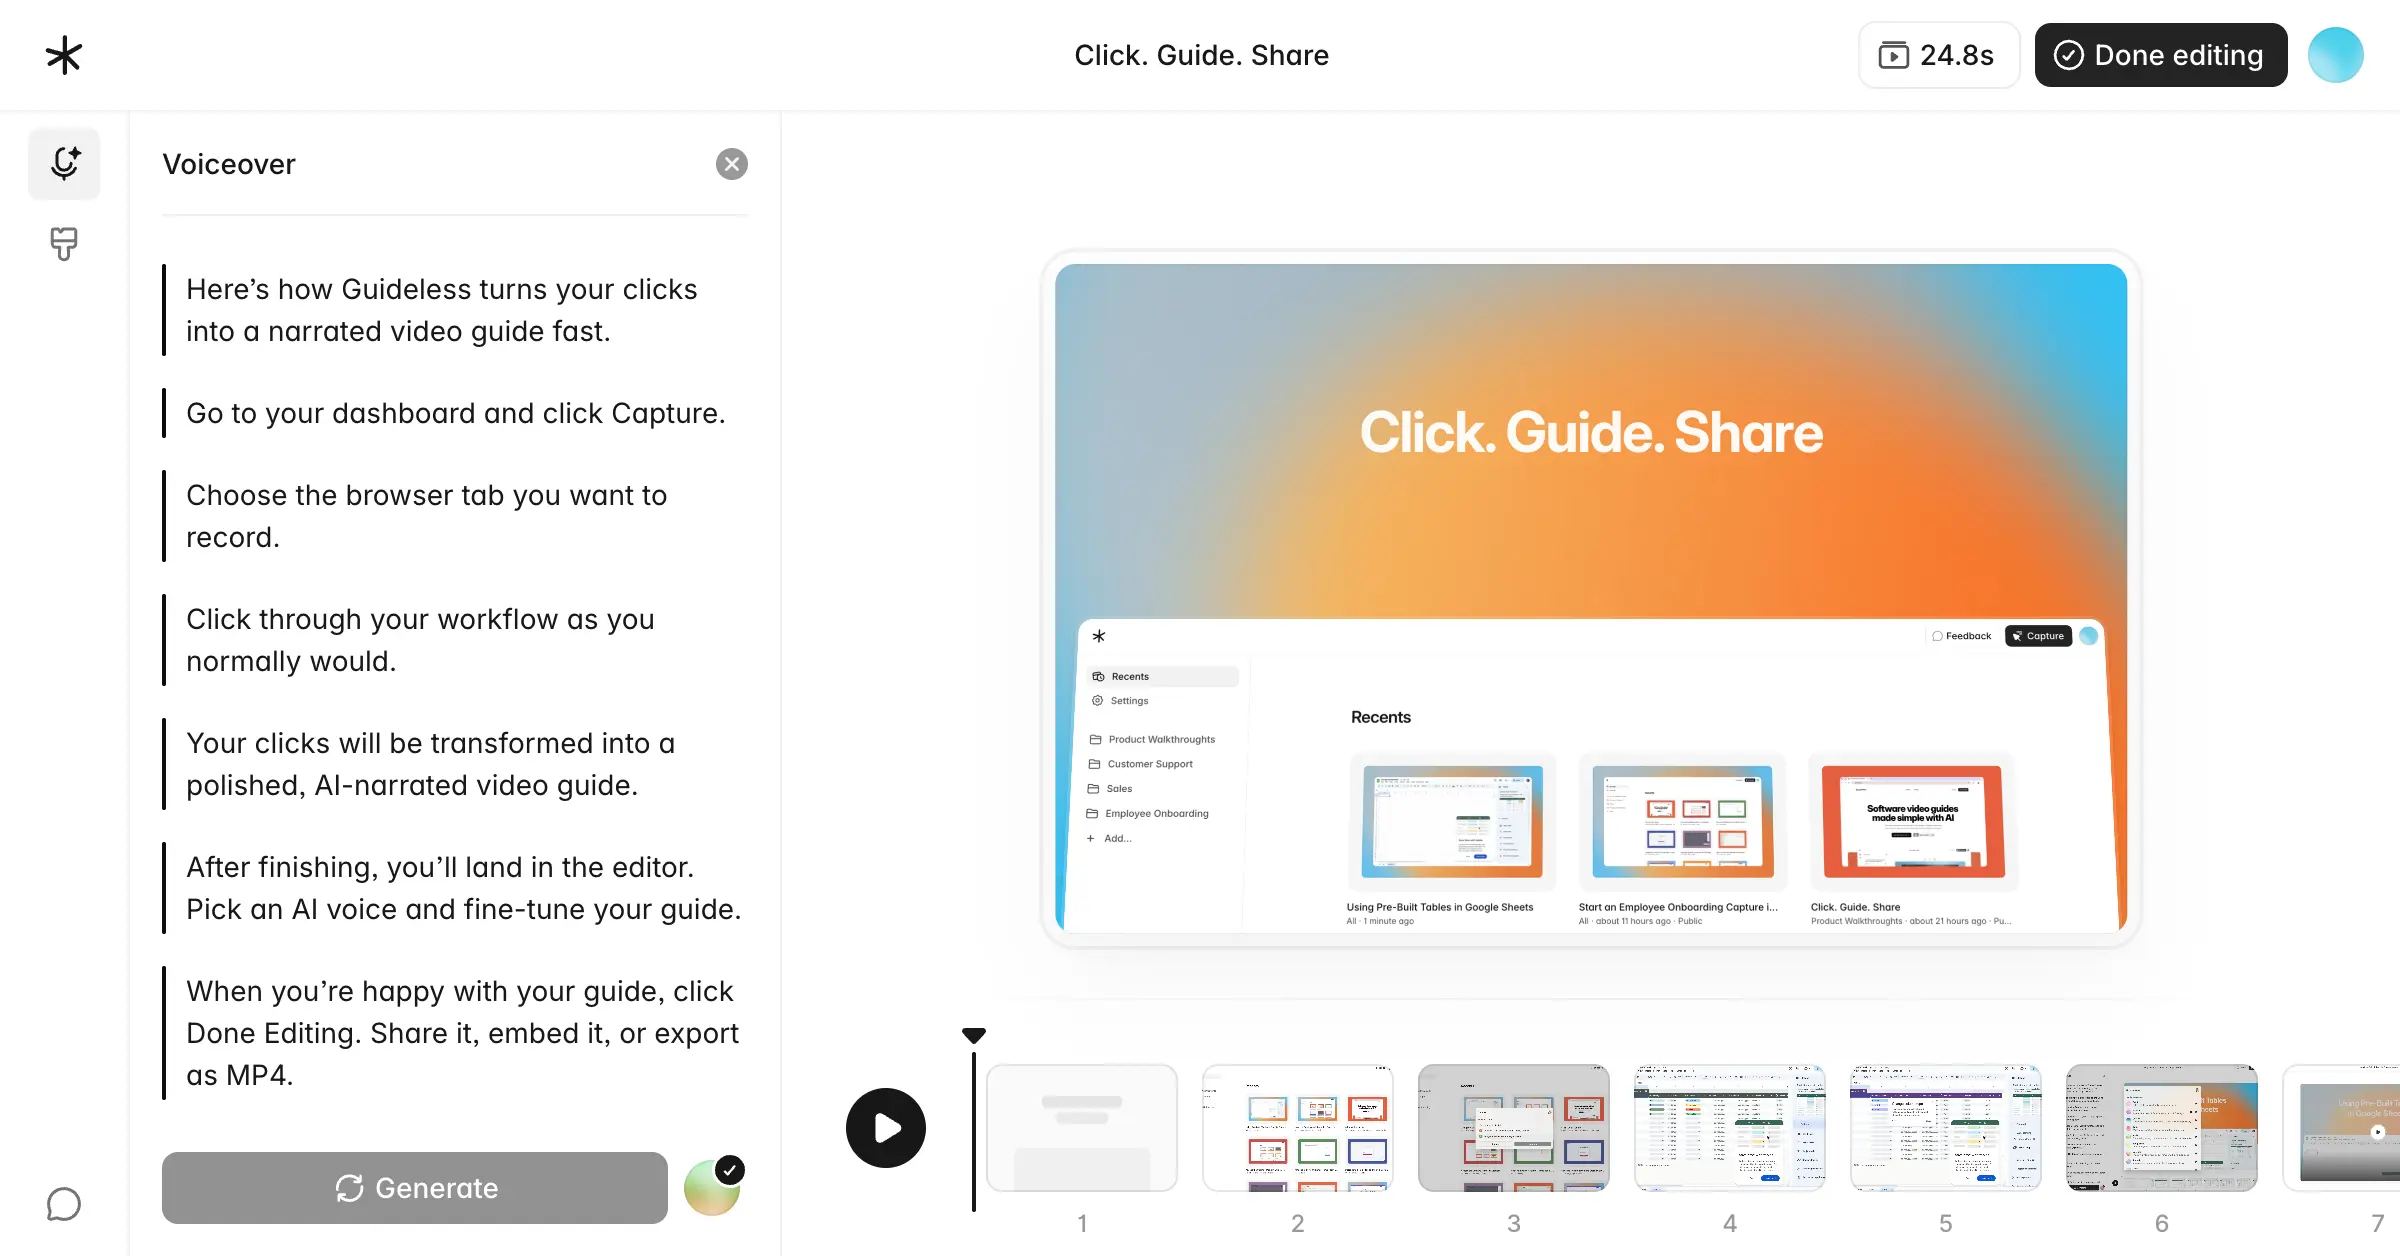
The same approach can also be used to create SOPs, tutorials, onboarding materials, quick walkthroughs, and other step-by-step instructions.
How to test and measure your troubleshooting guides
It would be a mistake to test the troubleshooting guide yourself. Give it to someone with little knowledge of the systems, such as a new hire or a person from another department. Time how long it takes for them to reach the fix and watch where they get stuck to improve the troubleshooting process.
Running a practice incident with the whole department is also a good way to collect data on three useful metrics: time to fix, tickets avoided, and how many guides get updated each quarter.
If a guide is never updated, it may be a sign that no one is reviewing it as the underlying process changes. Add your contact information at the end of each troubleshooting guide to collect feedback. This creates a positive loop: new issues get flagged, the guide gets updated, and version control tracks what changed.
Troubleshooting guide example
- Title and summary: Reconnecting a disconnected third-party integration.
- Before you start: You need admin access to both platforms, and the login originally used to connect them.
- Symptom: The integration shows "Disconnected," and records stop syncing between the two tools.
- Affected systems: Any workspace that relies on third-party integration.
- The steps:
- Confirm network connectivity.
- Check the integration's status page for error messages.
- If it points to an expired token, click Reconnect, sign in again, and approve permissions.
- If no token is expired and there are no other errors, run a manual sync to confirm. If manual sync doesn't help, contact the integration team.
- Root cause: Usually an expired authentication token, not a real outage.
- Fixes: Reauthorize the connection. If that fails, disconnect it fully and reconnect from scratch.
- How to check it worked: Status reads "Connected," and a new record syncs within a few minutes.
- Who to escalate to: The integrations team, if reauthorizing the token doesn't clear the issue.
- How to prevent it: Turn on renewal alerts so a new token is issued before the old one expires.
Closing
If there's a feedback mechanism, your troubleshooting guides will get better each time they're used. Don't try to document everything on the first attempt. Choose the top five tickets and write a guide around them.
The troubleshooting guide you publish today won't be the same one you're using in six months. Publish a working version and improve it over time.